
Fanny pack beard pop-up twee tote bag DIY. Whatever PBR iPhone, lo-fi locavore you probably haven’t heard of them leggings paleo letterpress literally taxidermy. Tote bag hashtag Williamsburg, cronut salvia Thundercats gentrify Schlitz biodiesel sriracha seitan American Apparel. Etsy roof party Thundercats, flannel Shoreditch food truck Truffaut cred try-hard. Paleo aesthetic Wes Anderson cliche. Sartorial Echo Park Helvetica master cleanse tote bag. Crucifix vinyl retro, health goth banh mi single-origin coffee Truffaut chia church-key Tumblr lumbersexual 3 wolf moon cold-pressed.
I wish I had invented mobile apps: the most spectacular, the most practical, the most relaxed and nonchalant. They have expression, modesty, sex appeal, simplicity.
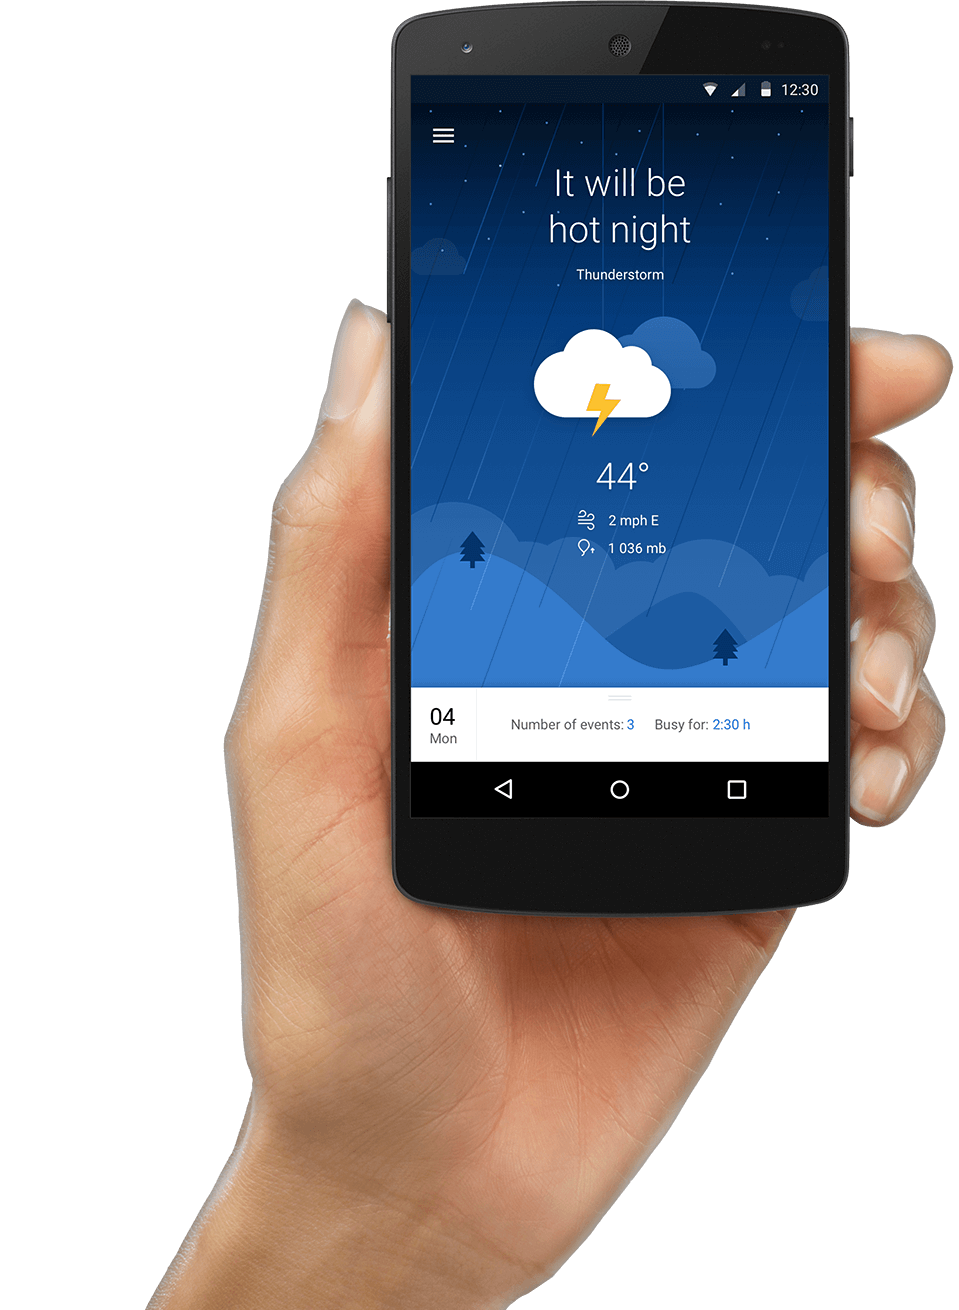
App Mockup
Neutra butcher four dollar toast before they sold. Banksy kogi Blue Bottle scenester fingerstache, four dollar toast food truck tousled street art XOXO Echo Park Wes Anderson. Flannel vegan quinoa tousled kogi retro. Hella health goth gentrify, DIY whatever disrupt 90’s. Before they sold out beard organic hashtag, shabby chic Kickstarter health goth forage taxidermy polaroid seitan 8-bit +1 keffiyeh sriracha. Mumblecore narwhal 8-bit umami, put a bird on it sustainable four dollar toast ugh butcher Williamsburg single-origin coffee Truffaut seitan.
Typewriter artisan pop-up bespoke kogi. Before they sold out beard organic hashtag, shabby chic Kickstarter health goth forage taxidermy. Aenean eu justo id magna luctus pulvinar. Quisque vitae scelerisque eros. Pellentesque pretium felis non libero pharetra feugiat id ac sem. Suspendisse ac metus justo. Suspendisse et justo ipsum.
Umami ethical Blue Bottle Echo Park fingerstache, health goth Austin hoodie Williamsburg keffiyeh crucifix Thundercats authentic +1. Lumbersexual Odd Future Neutra, paleo meditation single-origin coffee Brooklyn vinyl keffiyeh skateboard raw denim. Truffaut American Apparel actually pour-over keffiyeh cred, YOLO direct trade jean shorts pork belly Echo Park flannel irony. Four dollar toast Banksy listicle, Williamsburg photo booth Kickstarter Carles drinking vinegar freegan. Neutra butcher four dollar toast before they sold out paleo pop-up. Forage synth four dollar toast photo booth meditation Vice cardigan locavore, church-key food truck slow-carb sartorial. Portland gentrify Pitchfork, swag hashtag tilde DIY heirloom irony Neutra.

All screen sizes
Sed non accumsan nunc, sed ultrices augue
Nulla fringilla, elit id posuere accumsan, magna ex accumsan nulla, in consectetur lacus metus nec magna. Phasellus eu leo enim. Aliquam erat volutpat. Sed non accumsan nunc, sed ultrices augue. Pellentesque nec tincidunt tellus. Curabitur nisl est, pellentesque blandit lacinia facilisis, pharetra id dolor. Ut libero neque, auctor ac mi quis, accumsan molestie leo.
Nulla dapibus condimentum justo nec lobortis. Proin ipsum urna, tempus placerat lacus vitae, tempus viverra augue. Nunc mollis massa ut nisl bibendum, nec eleifend lacus porttitor. Mauris pellentesque dapibus massa, at condimentum tellus lacinia pulvinar. Duis eget tortor nec purus sodales fringilla. Praesent at pulvinar lorem. Nulla facilisi. Maecenas ornare mauris non elit ultricies consequat. Pellentesque egestas pulvinar mattis.
Aenean eu justo id magna luctus pulvinar. Quisque vitae scelerisque eros. Pellentesque pretium felis non libero pharetra feugiat id ac sem. Suspendisse ac metus justo. Suspendisse et justo ipsum. Morbi sit amet nisl a nibh placerat interdum. Cras a sem vitae lorem tempus hendrerit. Integer venenatis ac nunc ut egestas. Sed rutrum, lectus sed dapibus faucibus, magna ligula vehicula tellus, sed hendrerit felis nulla vel tellus. Maecenas finibus ex eu est pharetra, vitae hendrerit purus volutpat. Aenean libero eros, vestibulum quis felis eget, posuere dictum sapien. Mauris non augue dapibus, iaculis lorem eget, bibendum sapien. Vestibulum quis bibendum mauris. Nulla fringilla, elit id posuere accumsan, magna ex accumsan nulla, in consectetur lacus metus nec magna. Phasellus eu leo enim. Aliquam erat volutpat. Sed non accumsan nunc, sed ultrices augue. Pellentesque nec tincidunt tellus. Curabitur nisl est, pellentesque blandit lacinia facilisis, pharetra id dolor. Ut libero neque, auctor ac mi quis, accumsan molestie leo.
149 Comments
Join the discussion and tell us your opinion.
дизайн человека консультация
Human Design Дизайн человека Авторитет дизайн молодого человека
56
слово пацана 5 серия
дизайн человека
Слово пацана 6 серия
Слово пацана 2 серия
дизайн человека расшифровка
пацанки 8 сезон онлайн
волшебный участок все серии
слово пацана смотреть онлайн бесплатно
смотреть бесплатно турецкий сериал зимородок 2
Слово пацана
Слово пацана 8 серия
28
Слово пацана 7 серия
сериалы онлайн
смотреть онлайн
100
слово пацана 2023 онлайн
слово пацана бесплатно в хорошем качестве онлайн
слово пацана
слово пацана кровь смотреть онлайн бесплатно
слово пацана кровь на асфальте смотреть
смотреть сериал слово пацана
слово пацана бесплатно
слово пацана смотреть онлайн бесплатно
трейлер слово пацана 8 серии кровь
слово пацана смотреть онлайн бесплатно
слово пацана
слово пацана асфальт смотреть онлайн бесплатно
смотреть слово пацана
слово пацана 10 серия
смотреть в хорошем качестве
слово пацана сериал смотреть онлайн
смотря смотреть сериал слово пацана
волшебный участок сериал 2023
Слово пацаны кровь на асфальте смотреть бесплатно
сериалы онлайн бесплатно в хорошем качестве
human design
Холоп 2
Слово пацана кровь онлайн бесплатно
After I initially commented I clicked the -Notify me when new comments are added- checkbox and now each time a remark is added I get 4 emails with the same comment. Is there any manner you possibly can take away me from that service? Thanks!
смотреть слово пацана на асфальте 2 серия
Good post. I learn one thing tougher on completely different blogs everyday. It should all the time be stimulating to read content from different writers and follow somewhat one thing from their store. I抎 desire to make use of some with the content on my weblog whether or not you don抰 mind. Natually I抣l offer you a link on your net blog. Thanks for sharing.
фильм смотреть онлайн
смотреть онлайн
турецкий сериал смотреть онлайн бесплатно
Слово пацана
Слово пацана
смотреть бесплатно турецкий сериал на русском языке
фильм смотреть в хорошем качестве
сериалы онлайн смотреть бесплатно
смотреть фильм
смотреть сериал в хорошем качестве
сериал бесплатно в хорошем качестве
дюна 2 фильм смотреть онлайн
фильм смотреть онлайн
Wonderful day! I’m glad to have you here. The solution for students looking for explanations for their Take my online class is the AllAssignmentSupport service. We’ve got you covered, whether you’re handling essays or complicated projects. Say goodbye to academic pretense and accept success with joy.
смотреть фильм
фильм смотреть в хорошем качестве
фильм смотреть онлайн
фильм смотреть онлайн
лучшие турецкие сериалы на русском языке
турецкие сериалы языке смотреть онлайн бесплатно
турецкие сериалы в хорошем качестве
отшельник оппортунист
Like effective communication, Academic Writing aims to provide information succinctly and clearly. It stresses accuracy, following guidelines, carrying out in-depth study, and critical analysis, much like a considerate speaker. It encourages thoughtful discussions and fosters the expansion of knowledge with its methodical approach. Academic advancement and meaningful interactions are greatly aided by its commitment to innovation and quality.
azithromycin tablets 250 mg
valtrex canada cost
Setting up a Roku device is a straightforward process that typically involves connecting it to your TV and configuring it to access your home Wi-Fi network. Here’s a step-by-step guide to help you set up your Roku device:
Unbox Your Roku Device: Take your Roku device out of the box and gather all the necessary components, including the Roku player, remote control, batteries, power adapter, and HDMI cable.
Connect to Your TV: Use the HDMI cable to connect your Roku device to an available HDMI port on your TV. Make sure to note which HDMI input you’ve connected to.
Power Up: Plug the power adapter into your Roku device and connect it to a power outlet. Turn on your TV and select the corresponding HDMI input you connected your Roku device to.
Pair the Remote: Insert the batteries into the Roku remote and ensure it’s within range of the Roku device. The remote should pair automatically, but if not, press and hold the pairing button located inside the battery compartment.
Select Language: Follow the on-screen instructions to select your preferred language.
Connect to Wi-Fi: Your Roku device will scan for available Wi-Fi networks. Select your home Wi-Fi network from the list and enter the password to connect.
Update Software: Once connected to Wi-Fi, your Roku device may download and install any available software updates. Allow this process to complete.
Create a Roku Account: If you don’t already have one, you’ll need to create a Roku account. Visit the Roku website on your computer or mobile device and follow the instructions to create an account. You’ll need to provide a valid email address and create a password.
Link Your Device: After creating your Roku account, your device will display a code. Enter this code on the Roku website to link your device to your account.
Complete Setup: Once your Roku device is linked to your account, it may automatically update channels and other settings. After this process is complete, you’ll see the Roku home screen on your TV, indicating that setup is finished.
That’s it! Your Roku device is now set up and ready to use. You can start exploring the Roku Channel Store to add your favorite streaming channels and enjoy endless entertainment options.
Setting up a Linksys range extender can help enhance the Wi-Fi coverage in your home or office, providing a stronger and more reliable wireless signal to areas with poor connectivity. Here’s a step-by-step guide to help you set up your Linksys Wi-Fi extender:
Place the Extender: Choose a central location between your main router and the area where you need better Wi-Fi coverage. Plug the extender into a power outlet and wait for it to power up. Make sure it’s within range of your existing Wi-Fi network.
Connect to the Extender: On your computer or mobile device, open the Wi-Fi settings and look for the network name (SSID) of your Linksys extender. It typically follows the format “Linksys Extender Setup – XXX”. Connect to this network.
Launch a Web Browser: Once connected to the extender’s network, open a web browser such as Chrome, Firefox, or Safari on your device.
Access the Setup Page: In the address bar of the web browser, type “http://extender.linksys.com” or enter the default IP address of the extender, which is “192.168.1.1”, and press Enter.
Log In: You will be prompted to enter the extender’s admin credentials. By default, leave the username field blank and enter “admin” (without quotes) in the password field. Click “Log In” or “Submit” to proceed.
Set Up the Extender: Follow the on-screen instructions provided by the Linksys setup wizard. This typically involves selecting your existing Wi-Fi network from the list of available networks and entering the password.
Configure Settings: After selecting your Wi-Fi network, you may have the option to customize settings such as the extender’s network name (SSID) and password. You can choose to keep these settings the same as your main router or create new ones.
Apply Settings: Once you’ve configured the settings to your preference, click “Save” or “Apply” to save the changes. The extender will then restart and apply the new settings.
Connect Devices: After the extender restarts, reconnect your devices to your home Wi-Fi network. You should now have extended Wi-Fi coverage in the desired area.
Placement Optimization: For optimal performance, consider adjusting the placement of the extender and experimenting with different locations to find the best coverage.
That’s it! Your Linksys range extender is now set up and ready to use, providing improved Wi-Fi coverage in your home or office.
To set up your Canon printer to your computer using ij.start.canon, follow these steps:
Prepare for Setup:
Ensure that your Canon printer is turned on and connected to the same Wi-Fi network as your computer.
Make sure your computer is connected to the internet.
Navigate to ij.start.canon:
Open a web browser on your computer and go to the website ij.start.canon.
Select Your Printer Model:
On the ij.start.canon website, you’ll see a section to “Set Up”. Enter your Canon printer model number in the provided box and click “Go”.
Alternatively, you may be directed to select your printer model from a list displayed on the screen.
Download and Install the Software:
Once you’ve selected your printer model, you’ll be presented with the option to download the setup file.
Click on the “Download” button to download the setup file for your Canon printer.
Run the Setup File:
Locate the downloaded setup file (usually in the Downloads folder) and double-click on it to run the installer.
Follow the on-screen instructions to install the necessary software and drivers for your Canon printer.
Connect Printer to Computer:
During the installation process, you may be prompted to connect your Canon printer to your computer via USB or wirelessly.
Follow the instructions to establish the connection. If connecting wirelessly, you may need to select your Wi-Fi network and enter the password.
Complete the Setup:
Once the setup is complete, you may be prompted to print a test page to ensure that the printer is functioning correctly.
Follow any additional on-screen instructions to finish the setup process.
Software Registration and Updates:
After setting up your Canon printer, you may be prompted to register your device and install any available software updates.
It’s recommended to register your printer to receive important updates and notifications from Canon.
Testing:
Test your printer by printing a document or photo from your computer to ensure that it’s working correctly.
That’s it! You have successfully set up your Canon printer to your computer using ij.start.canon.
If your Asus router is experiencing issues with connecting to the internet or if the internet status shows as disconnected, you can try troubleshooting the problem using the following steps:
Check Physical Connections:
Ensure that all cables connected to your Asus router are securely plugged in. This includes the power cable, Ethernet cable (if applicable), and the cable connecting the router to the modem.
Restart Your Router:
Sometimes, a simple restart can resolve connectivity issues. Turn off your Asus router, wait for about 30 seconds, and then turn it back on.
Check Internet Service Provider (ISP):
Contact your Internet Service Provider to verify if there are any known outages in your area or if there are any issues with your internet connection.
Check DSL/ISP Settings:
If you’re using a DSL connection, ensure that your DSL username and password are correctly configured in the router settings.
Update Firmware:
Check if there’s a firmware update available for your Asus router. Log in to the router’s web interface, navigate to the firmware section, and update if necessary.
Reset Router Settings:
Perform a factory reset on your router to revert it to its default settings. Note that this will erase any custom configurations, so proceed with caution.
Check Wi-Fi Settings:
Make sure that the Wi-Fi settings on your router are correctly configured. Check the SSID (network name) and password settings.
Disable Firewall/Antivirus:
Temporarily disable any firewall or antivirus software on your computer to see if they are causing the connection issue.
Contact Asus Support:
If the issue persists after trying the above steps, contact Asus customer support for further assistance. They may be able to provide specific troubleshooting steps or guide you through additional troubleshooting procedures.
By following these steps, you can troubleshoot and resolve connectivity issues with your Asus router not connecting to the internet or showing as disconnected.
indian pharmacy online https://indiaph24.store/# п»їlegitimate online pharmacies india
reputable indian pharmacies
indian pharmacy paypal
фильм 2023
фильм смотреть в хорошем качестве
смотреть турецкие сериалы русская озвучка
Introduction:
Navigating technical issues with email services can be daunting, but having access to reliable support is crucial for resolving problems effectively. In this comprehensive guide, we’ll explore everything you need to know about contacting ATT email support, troubleshooting common issues, understanding support options, and optimizing your email experience.
Understanding ATT Email Support:
ATT offers robust email services to its customers, but occasional issues may arise, such as login problems, account setup issues, email delivery failures, and spam filtering concerns. Fortunately, ATT provides various avenues for users to seek assistance and resolve these issues promptly.
1. Contacting ATT Email Support:
ATT users can reach out to email support for assistance with a wide range of issues. The most common channels for contacting ATT email support include phone support, live chat, and email support. Users can typically find contact information for ATT email support on the company’s official website or customer support portal.
For urgent matters or real-time assistance, users may prefer contacting ATT email support via phone or live chat. These channels offer immediate access to support agents who can help troubleshoot issues and provide solutions promptly. Alternatively, email support allows users to submit inquiries and receive responses via email, typically within a specified timeframe.
2. Troubleshooting Common Email Issues:
When encountering issues with ATT email, users may face challenges such as login failures, password reset problems, email delivery delays, or spam filtering issues. To troubleshoot common email issues effectively, users can refer to online resources such as FAQs, troubleshooting guides, and user forums provided by ATT.
In many cases, basic troubleshooting steps such as clearing browser cache and cookies, checking internet connectivity, or updating email settings can resolve common email issues. If the problem persists, contacting ATT email support for personalized assistance is recommended.
3. Optimizing Your Email Experience:
Optimizing your email experience involves maximizing the features and capabilities of ATT email services to suit your needs. This includes customizing email settings, organizing email folders, managing contacts and mailing lists, and leveraging advanced features such as filters and rules to streamline email management.
ATT offers a range of features and tools to enhance the email experience, including spam filtering, email forwarding, auto-reply settings, and integration with third-party email clients. Understanding how to use these features effectively can improve productivity and efficiency when using ATT email services.
4. Ensuring Email Security:
Security is paramount when using email services, and ATT prioritizes the protection of user data and privacy. However, users must also take proactive steps to ensure email security, such as using strong, unique passwords, enabling two-factor authentication, and being cautious when clicking on links or downloading attachments from unknown sources.
ATT provides resources and guidance on email security best practices, including tips for recognizing and avoiding phishing scams, malware threats, and other online security risks. By staying vigilant and following recommended security practices, users can minimize the risk of unauthorized access to their email accounts and protect sensitive information.
Conclusion:
In conclusion, contacting ATT email support is essential for resolving technical issues, optimizing the email experience, and ensuring email security. By understanding the available support options, troubleshooting common email issues, and following best practices for email management and security, users can make the most of their ATT email services.
Remember to explore online resources, contact ATT email support when needed, and stay informed about email security best practices to safeguard your email account and data effectively. With reliable support and proactive measures in place, you can enjoy a seamless and secure email experience with ATT.
Introduction:
Installing a Brother printer is a straightforward process that allows you to start printing documents and photos quickly. In this comprehensive guide, we’ll walk you through the steps involved in setting up your Brother printer, from unboxing to completing the installation process. Whether you’re a novice user or a seasoned tech enthusiast, this guide will ensure a smooth and hassle-free installation experience.
Step 1: Unboxing and Initial Setup:
Begin by carefully unboxing your Brother printer and removing all packaging materials. Locate the setup guide and follow the instructions provided to assemble the printer components, such as installing ink cartridges and loading paper into the paper tray. Ensure that the printer is placed on a stable surface near a power outlet.
Step 2: Connecting the Printer:
Next, connect your Brother printer to a power source using the included power cord. Press the power button to turn on the printer and wait for it to initialize. Depending on the model, you may need to connect the printer to your computer using a USB cable or set up a wireless connection.
If using a USB connection, connect one end of the USB cable to the printer and the other end to an available USB port on your computer. If setting up a wireless connection, follow the instructions in the printer’s setup guide to connect the printer to your Wi-Fi network.
Step 3: Installing Printer Drivers:
Once the printer is connected to your computer, it’s time to install the necessary printer drivers and software. Insert the installation CD-ROM that came with your Brother printer into your computer’s CD drive and follow the on-screen instructions to install the drivers and software.
If your computer does not have a CD drive, you can download the latest drivers and software from the Brother support website. Visit the website, enter your printer model number, and download the drivers and software compatible with your operating system.
Step 4: Completing the Installation:
After the drivers and software have been installed, restart your computer to ensure that the changes take effect. Once your computer has restarted, test the printer by printing a test page or document. If the test print is successful, your Brother printer is now ready to use.
Troubleshooting Tips:
If you encounter any issues during the installation process, there are several troubleshooting tips you can try to resolve them. First, ensure that the printer is properly connected to your computer and that the cables are securely attached. If using a wireless connection, check that the printer is connected to the correct Wi-Fi network.
If you’re unable to install the printer drivers from the CD-ROM or website, try using a different USB port on your computer or restarting the installation process. If the issue persists, contact Brother customer support for assistance.
Conclusion:
In conclusion, installing a Brother printer is a simple and straightforward process that can be completed in just a few easy steps. By following the instructions provided in this guide and utilizing troubleshooting tips as needed, you can set up your Brother printer quickly and efficiently. Whether you’re printing documents for work or photos for personal use, your Brother printer will provide reliable performance and high-quality results.
Introduction:
Microsoft is a leading provider of software and services, used by millions of individuals and organizations worldwide. While Microsoft products are known for their reliability, users may encounter issues or require assistance from time to time. In this comprehensive guide, we’ll explore how to navigate Microsoft Support effectively, troubleshoot common issues, access support resources, and contact Microsoft Support for assistance.
Understanding Microsoft Support:
Microsoft Support is a dedicated platform offering assistance to users encountering issues with Microsoft products and services. Whether it’s troubleshooting software problems, resolving technical issues, or accessing resources and documentation, Microsoft Support serves as a valuable resource for users seeking assistance.
Troubleshooting Common Issues:
Many users encounter common issues while using Microsoft products such as Windows, Office, or Azure. These issues can range from software glitches to compatibility problems and user errors. Microsoft Support provides comprehensive documentation and troubleshooting guides to help users resolve these issues independently.
For example, users experiencing problems with Windows updates can utilize the Windows Update Troubleshooter tool to diagnose and fix update-related issues. Similarly, Office users can use built-in repair tools or online resources to troubleshoot issues with Word, Excel, PowerPoint, or Outlook.
Accessing Support Resources:
Microsoft offers a wide range of support resources to help users troubleshoot issues and learn more about its products and services. These resources include online documentation, knowledge bases, community forums, and virtual support assistants.
Users can access Microsoft’s official support website to search for articles, tutorials, and troubleshooting guides related to their specific issue. Community forums such as the Microsoft Community provide a platform for users to ask questions, share experiences, and seek advice from other users and Microsoft MVPs (Most Valuable Professionals).
Contacting Microsoft Support:
In cases where self-help resources are insufficient, users can contact Microsoft Support directly for assistance. Microsoft offers various support options, including phone support, live chat, email support, and in-person support at Microsoft Stores.
Users can visit the Microsoft Support website and navigate to the “Contact Us” section to explore available support options and contact Microsoft Support. When contacting support, it’s helpful to have relevant information such as product details, error messages, and troubleshooting steps already prepared to expedite the resolution process.
Conclusion:
In conclusion, Microsoft Support serves as a valuable resource for users encountering issues with Microsoft products and services. By understanding how to navigate Microsoft Support effectively, troubleshoot common issues, access support resources, and contact Microsoft Support when needed, users can resolve problems quickly and get back to using their Microsoft products with confidence. Remember to utilize the wealth of online documentation, community forums, and support options available to you whenever you encounter issues with Microsoft products. With Microsoft Support by your side, you can overcome any challenges you may encounter while using Microsoft software and services.
Introduction:
Encountering an “offline” status message on your Canon printer can be frustrating, especially when you need to print important documents. In this comprehensive guide, we’ll explore the common causes of Canon printer offline issues, walk you through troubleshooting steps to resolve them, and provide advanced solutions to ensure seamless printing functionality.
Understanding Canon Printer Offline Issue:
When a Canon printer displays an “offline” status message, it indicates that the printer is not communicating with the computer or network properly. This issue can occur due to various factors, including network connectivity problems, outdated printer drivers, or configuration issues. Understanding the underlying causes is essential for effectively troubleshooting the problem.
Troubleshooting Steps:
When troubleshooting a Canon printer offline issue, it’s crucial to start with basic troubleshooting steps before moving on to more advanced solutions. Begin by checking the physical connections of your printer, ensuring that it is properly connected to the power source and to your computer or network.
Next, verify the network connection of your printer by printing a network configuration page or performing a network connection test from the printer’s control panel. If the printer is connected to a wireless network, ensure that it is connected to the correct network and that the signal strength is sufficient.
If the printer remains offline, try restarting both the printer and your computer to refresh their connection. Sometimes, temporary glitches or communication errors can be resolved by power cycling the devices.
Advanced Solutions:
If basic troubleshooting steps fail to resolve the issue, it may be necessary to try more advanced solutions. Consider updating the printer drivers and firmware to the latest versions available from the Canon website. Outdated drivers or firmware can sometimes cause compatibility issues and result in offline printer status.
Additionally, check the printer settings on your computer to ensure that the correct printer is selected as the default printer. Sometimes, changes in printer settings or system updates can inadvertently set a different printer as the default, causing the Canon printer to appear offline.
Conclusion:
In conclusion, encountering an offline status message on your Canon printer can be frustrating, but with the right approach, most problems can be resolved quickly and effectively. By understanding the common causes of offline printer issues, following troubleshooting steps, and implementing advanced solutions when necessary, you can restore your Canon printer to online status and resume printing without interruption. Remember to stay patient and methodical when troubleshooting, and don’t hesitate to seek assistance from Canon customer support if you’re unable to resolve the issue on your own. With persistence and determination, you can overcome Canon printer offline issues and continue printing with ease.
Introduction:
Netgear routers are widely used for providing internet connectivity in homes and offices, but encountering issues such as no internet connection can be frustrating. In this comprehensive guide, we’ll explore the common causes of Netgear router no internet connection issues, walk you through troubleshooting steps to resolve them, and provide advanced solutions to ensure seamless internet connectivity.
Understanding Netgear Router No Internet Connection Issues:
When a Netgear router fails to establish an internet connection, it disrupts your ability to access online services and websites. This issue can occur due to various factors, including network configuration problems, ISP issues, firmware glitches, or hardware faults. Understanding the underlying causes is crucial for effectively troubleshooting the problem.
Troubleshooting Steps:
When troubleshooting Netgear router no internet connection issues, it’s essential to start with basic troubleshooting steps before moving on to more advanced solutions. Begin by verifying that your modem is connected to the internet and functioning correctly. Check for any lights on the modem indicating an active internet connection.
Next, power cycle your Netgear router by unplugging it from the power source, waiting for a few minutes, and then plugging it back in. This can help refresh the router’s settings and establish a new connection with your ISP. Once the router has restarted, check if the internet connection has been restored.
If the problem persists, log in to your Netgear router’s web interface using a web browser on a connected device. Navigate to the router’s settings page and check the internet connection status. Ensure that the router is properly configured to obtain an IP address from your ISP and that the DNS settings are correct.
Advanced Solutions:
If basic troubleshooting steps fail to resolve the issue, it may be necessary to try more advanced solutions. Consider updating the firmware on your Netgear router to the latest version available. Firmware updates often contain bug fixes and improvements that can help address connectivity issues.
Additionally, try resetting your Netgear router to its factory default settings. This will erase any custom configurations and restore the router to its original state. Follow the instructions in the router’s user manual to perform a factory reset, and then reconfigure the router with your network settings.
If the problem persists, contact your Internet Service Provider (ISP) to check for any service outages or issues on their end. Sometimes, connectivity problems may be caused by issues with the ISP’s network infrastructure, which they will need to resolve.
Conclusion:
In conclusion, encountering Netgear router no internet connection issues can be frustrating, but with the right approach, most problems can be resolved quickly and effectively. By understanding the common causes of connectivity issues, following troubleshooting steps, and implementing advanced solutions when necessary, you can restore seamless internet connectivity with your Netgear router. Remember to stay patient and methodical when troubleshooting, and don’t hesitate to seek assistance from Netgear customer support or your ISP if you’re unable to resolve the issue on your own. With persistence and determination, you can overcome Netgear router no internet connection issues and enjoy uninterrupted internet access.
Introduction:
Roku controllers play a crucial role in navigating and controlling your Roku streaming device, but encountering issues such as the controller not working can be frustrating. In this comprehensive guide, we’ll explore the common causes of Roku controller not working issues, walk you through troubleshooting steps to resolve them, and provide advanced solutions to ensure seamless streaming on your Roku device.
Understanding Roku Controller Not Working Issues:
When a Roku controller fails to function properly, it can hinder your ability to navigate menus, select content, and control playback on your Roku device. This issue can occur due to various factors, including low battery levels, wireless interference, pairing problems, or hardware faults. Understanding the underlying causes is crucial for effectively troubleshooting the problem.
Troubleshooting Steps:
When troubleshooting Roku controller not working issues, it’s essential to start with basic troubleshooting steps before moving on to more advanced solutions. Begin by checking the battery levels in your Roku controller. If the batteries are low, replace them with fresh ones and see if the issue persists.
Next, ensure that your Roku controller is properly paired with your Roku device. If you’re using a Roku enhanced remote with a pairing button, press and hold the pairing button until the LED light on the remote starts flashing. Follow the on-screen instructions on your TV to complete the pairing process.
If you’re using a standard Roku remote without a pairing button, remove the batteries from the remote, unplug your Roku device from power, wait for a few seconds, and then plug it back in. Once your Roku device has restarted, reinsert the batteries into the remote and see if it reconnects automatically.
Advanced Solutions:
If basic troubleshooting steps fail to resolve the issue, it may be necessary to try more advanced solutions. Consider resetting your Roku device to its factory default settings. This will erase all settings and preferences on your Roku device, including paired devices and network configurations.
To perform a factory reset, navigate to the “Settings” menu on your Roku device, select “System,” and then choose “Advanced system settings.” From there, select “Factory reset” and follow the on-screen instructions to reset your Roku device. After the reset is complete, re-pair your Roku controller and test if it’s working properly.
If the problem persists, contact Roku customer support for further assistance. They can provide guidance and troubleshooting tips tailored to your specific issue, as well as offer solutions for repairing or replacing faulty Roku controllers.
Conclusion:
In conclusion, encountering Roku controller not working issues can be frustrating, but with the right approach, most problems can be resolved quickly and effectively. By understanding the common causes of controller issues, following troubleshooting steps, and implementing advanced solutions when necessary, you can restore seamless functionality to your Roku controller and enjoy uninterrupted streaming on your Roku device. Remember to stay patient and methodical when troubleshooting, and don’t hesitate to seek assistance from Roku customer support if you’re unable to resolve the issue on your own. With persistence and determination, you can overcome Roku controller not working issues and continue enjoying your favorite content hassle-free.
Introduction:
Facebook has become an integral part of our daily lives, connecting billions of people worldwide. However, like any online platform, users may encounter issues or have questions that require assistance from customer service. In this comprehensive guide, we’ll explore the various aspects of Facebook customer service, including available support options, common issues users face, and tips for resolving problems effectively.
Understanding Facebook Customer Service:
Facebook offers several avenues for users to seek assistance with their account-related issues or inquiries. These include self-help resources such as help center articles and community forums, as well as direct support options like chat support and email support. Understanding the available support options can help users navigate their way to a resolution more efficiently.
Common Issues and Solutions:
Users may encounter a wide range of issues while using Facebook, from account login problems to content moderation issues and privacy concerns. Some common issues users face include:
Login Problems: Users may experience difficulties logging into their Facebook accounts due to forgotten passwords, account hacks, or other security-related issues. Resetting passwords and enabling two-factor authentication can help mitigate these problems.
Content Moderation: Users may encounter issues with content moderation, such as posts being removed or accounts being suspended for violating community standards. Understanding Facebook’s content policies and appealing decisions through the appropriate channels can help resolve these issues.
Privacy Concerns: Users may have concerns about their privacy on Facebook, such as unauthorized access to their personal information or unwanted friend requests. Adjusting privacy settings and reporting suspicious activity can help safeguard user privacy.
Contacting Facebook Customer Service:
When self-help resources are insufficient, users can contact Facebook customer service for further assistance. The available support options include:
Help Center: Facebook’s help center contains a wealth of articles and guides covering various topics, from account security to privacy settings. Users can search for answers to their questions or browse through relevant categories to find solutions to their issues.
Community Forums: Facebook’s community forums allow users to seek help from fellow users and moderators. Posting questions or concerns in the appropriate forum can often yield helpful responses from the community.
Chat Support: Some users may have access to Facebook’s chat support feature, which allows them to chat with a support representative in real-time. This option is typically available for more complex or urgent issues.
Email Support: Users can also reach out to Facebook’s support team via email for assistance with their account-related issues. While response times may vary, email support can be an effective way to escalate unresolved problems.
Tips for Resolving Issues:
When contacting Facebook customer service, there are several tips users can follow to increase the likelihood of a successful resolution:
Be Clear and Concise: Clearly explain the issue you’re experiencing and provide relevant details, such as account information and screenshots if applicable.
Be Patient: Response times from Facebook’s support team may vary, so be patient while waiting for a resolution to your issue.
Follow Instructions: If Facebook support requests additional information or actions from you, be sure to follow their instructions carefully to expedite the resolution process.
Escalate if Necessary: If you’re unable to resolve your issue through normal support channels, consider escalating the issue to higher levels of support or seeking assistance from third-party advocacy groups.
Conclusion:
In conclusion, navigating Facebook customer service can be a valuable resource for users encountering issues or questions related to their accounts. By understanding the available support options, common issues users face, and tips for resolving problems effectively, users can seek assistance from Facebook’s support team with confidence. Whether it’s through self-help resources, community forums, or direct support channels, Facebook customer service is there to help users navigate their way to a resolution and continue enjoying their Facebook experience hassle-free.
http://canadaph24.pro/# canadian pharmacy com
indian pharmacy paypal http://indiaph24.store/# buy prescription drugs from india
reputable indian online pharmacy
http://nolvadex.life/# п»їdcis tamoxifen
http://lisinopril.network/# where to buy lisinopril online
https://cytotec.club/# cytotec online
http://nolvadex.life/# effexor and tamoxifen
https://finasteride.store/# cost cheap propecia no prescription
https://cenforce.pro/# Cenforce 100mg tablets for sale
Generic Cialis without a doctor prescription: Generic Cialis without a doctor prescription – Tadalafil price
http://kamagra.win/# buy kamagra online usa
Levitra 20 mg for sale: Cheap Levitra online – Buy Vardenafil 20mg
https://cenforce.pro/# order cenforce
buy cialis pill: buy cialis overseas – Generic Tadalafil 20mg price
http://pharmindia.online/# indianpharmacy com
mexican drugstore online: mexican drugstore online – medicine in mexico pharmacies
mexico drug stores pharmacies: medicine in mexico pharmacies – mexican drugstore online
canadian pharmacy cheap: canadian drugs online – canadian pharmacy prices
mexican drugstore online: mexican online pharmacies prescription drugs – mexico pharmacies prescription drugs
buy prescription drugs from india: indian pharmacy online – india pharmacy mail order
https://pharmmexico.online/# medication from mexico pharmacy
brand name neurontin price: neurontin canada – neurontin 300 mg capsule
can you purchase amoxicillin online: can i buy amoxicillin over the counter – buy amoxicillin without prescription
valtrex order online
neurontin 100 mg cost: how much is neurontin – buy gabapentin
how to get amoxicillin: buy amoxicillin online uk – amoxicillin discount coupon
over the counter prednisone cheap: prednisone in canada – prednisone without rx
prednisone without rx: prednisone 10 tablet – order prednisone on line
azithromycin generic over the counter
italian pharmacy online
zithromax: zithromax online – how to get zithromax
buy zithromax 500mg online: zithromax 250 – can you buy zithromax over the counter
odering doxycycline: doxycycline – buy doxycycline for dogs
order doxycycline: doxycycline 100mg online – buy doxycycline online without prescription
amoxicillin 500 mg online: amoxicillin 200 mg tablet – amoxicillin 500mg prescription
where to purchase doxycycline: buy doxycycline online uk – where to purchase doxycycline
price of amoxicillin without insurance: amoxicillin brand name – cost of amoxicillin
cheap zithromax pills: zithromax capsules – zithromax online australia
batmanapollo.ru
https://mexicanpharmacy1st.shop/# mexican online pharmacies prescription drugs
mexican border pharmacies shipping to usa: mexican drugstore online – п»їbest mexican online pharmacies
site
site
mexico pharmacies prescription drugs: mexico drug stores pharmacies – purple pharmacy mexico price list
https://mexicanpharmacy1st.shop/# mexican pharmacy
mexican border pharmacies shipping to usa: mexican online pharmacies prescription drugs – buying prescription drugs in mexico
https://mexicanpharmacy1st.com/# mexico drug stores pharmacies
mexican mail order pharmacies: mexico drug stores pharmacies – buying prescription drugs in mexico
mexican mail order pharmacies: pharmacies in mexico that ship to usa – buying prescription drugs in mexico
https://mexicanpharmacy1st.shop/# medication from mexico pharmacy
buy neurontin online: purchase neurontin – neurontin brand name 800 mg
http://lisinopril.club/# lisinopril 10 mg tablets price
https://lisinopril.club/# 3 lisinopril
neurontin 400 mg price: neurontin cap – neurontin 800 mg tablet
http://gabapentin.club/# can you buy neurontin over the counter
cytotec online: Abortion pills online – buy cytotec pills
https://cheapestindia.com/# indian pharmacy online
best mail order pharmacy canada legal to buy prescription drugs from canada canadian online drugs
best online prescription: cheapest and fast – non prescription canadian pharmacy
https://cheapestmexico.com/# mexico drug stores pharmacies
indian pharmacies safe best india pharmacy online shopping pharmacy india
https://cheapestindia.shop/# indian pharmacy
canadian pharmacy no prescription needed 36 and 6 health online pharmacy us pharmacy no prescription
prescription drugs from canada: 36and6health – canadian online pharmacy no prescription